
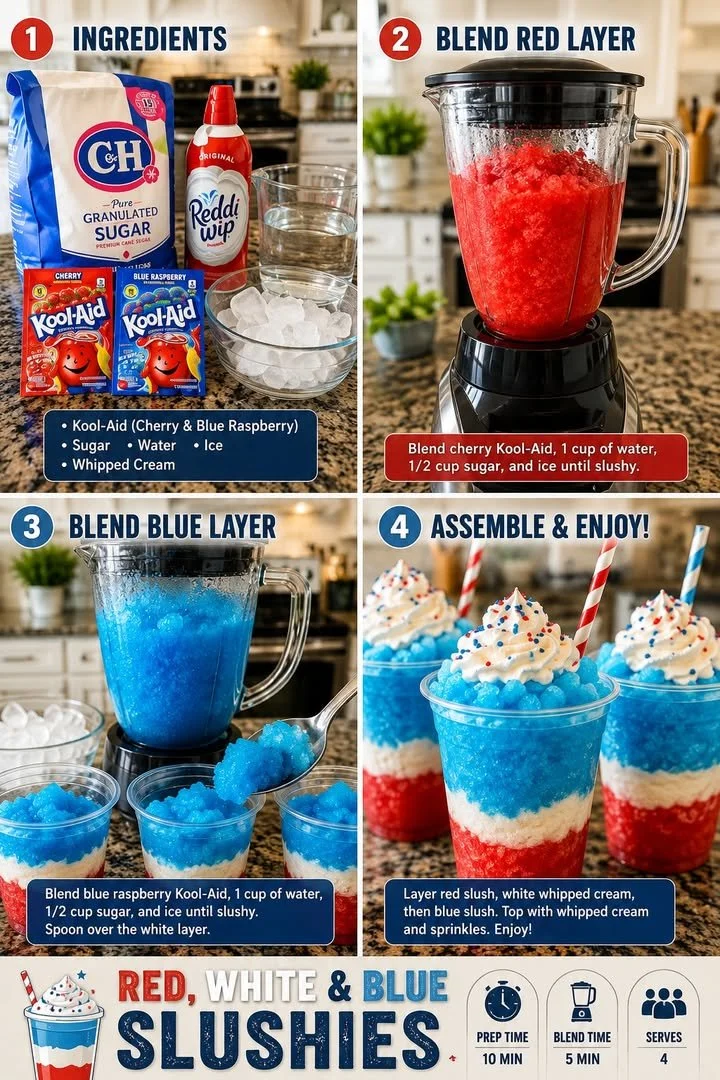
why make this recipe
Red White & Blue Kool-Aid Slush Cups are perfect for celebrating holidays like the Fourth of July or any summer gathering. They look festive and are a cool treat on a hot day. Plus, they are easy to make and can be customized with your favorite flavors. Gather your family and friends to enjoy a delicious and colorful dessert that everyone will love!
how to make Red White & Blue Kool-Aid Slush Cups
Ingredients:
- 2 cups Kool-Aid (Your choice of flavors for red, white, and blue)
- 1 cup water
- Ice cubes
- Whipped cream (for topping)
- Red and blue sprinkles (optional)
- Fruit pieces (like strawberries and blueberries, optional)
Directions:
- In a bowl, prepare the red Kool-Aid by mixing 1 cup of Kool-Aid powder with 1 cup of water.
- Pour the red Kool-Aid mixture into slush cups and freeze until solid.
- For the white layer, you can use crushed ice mixed with lemonade or a white drink of your choice. Pour it over the frozen red layer and freeze again until solid.
- Prepare the blue Kool-Aid in the same way and pour it over the white layer, then freeze again until it is fully set.
- When ready to serve, top with whipped cream, and add red and blue sprinkles or fruit pieces for decoration.
how to serve Red White & Blue Kool-Aid Slush Cups
Serve these bright and fun slush cups to your guests in a festive setting. You can let everyone decorate their cups with whipped cream and sprinkles. They make a fun and interactive dessert during parties!
how to store Red White & Blue Kool-Aid Slush Cups
Store any leftover slush cups in the freezer. Make sure they are covered to prevent freezer burn. They can stay fresh for a few days. Just take them out when you’re ready to enjoy them again!
tips to make Red White & Blue Kool-Aid Slush Cups
- Use your favorite Kool-Aid flavors to personalize the slush cups.
- For a smoother texture, blend the ice cubes with a little water before adding them to the cups.
- Make a larger batch by multiplying the ingredient amounts, especially for big gatherings.
variation
You can switch out the Kool-Aid flavors to match your personal taste. Try using grape for purple, or different sodas for a fizzy twist!
FAQs
Can I use another drink instead of Kool-Aid?
Yes, you can use any flavored drink mix or even fruit juice!
How long does it take to freeze the slush cups?
Each layer should freeze for about 2-3 hours, depending on your freezer.
Can kids help make this recipe?
Absolutely! This is a fun recipe for kids to help with, especially pouring and decorating!

Red White & Blue Kool-Aid Slush Cups
Ingredients
Method
- In a bowl, prepare the red Kool-Aid by mixing 1 cup of Kool-Aid powder with 1 cup of water.
- Pour the red Kool-Aid mixture into slush cups and freeze until solid.
- For the white layer, use crushed ice mixed with lemonade or a white drink of your choice. Pour it over the frozen red layer and freeze again until solid.
- Prepare the blue Kool-Aid in the same way and pour it over the white layer, then freeze again until it is fully set.
- When ready to serve, top with whipped cream, and add red and blue sprinkles or fruit pieces for decoration.