
***
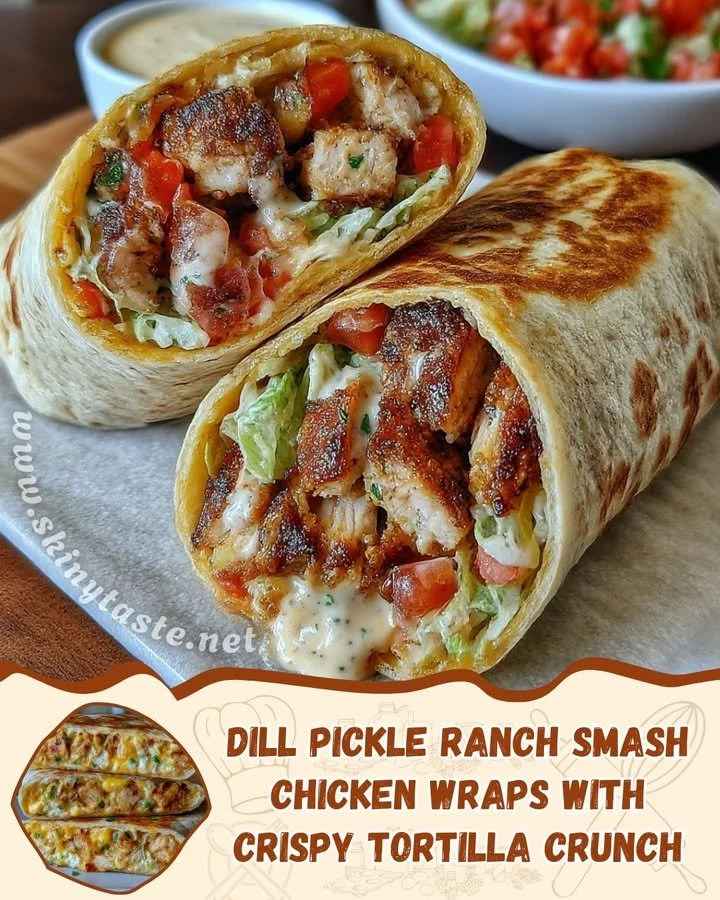
Dill Pickle Ranch Smash Chicken Wraps with Crispy Tortilla Crunch are a delicious and fun meal that you can whip up in no time. These wraps combine the tangy flavor of dill pickles with creamy ranch dressing, all wrapped around tender chicken and fresh veggies. Perfect for lunch or a quick dinner, this recipe is sure to please everyone.
Why make this recipe
This recipe is a great choice for several reasons. First, it’s incredibly easy to make, which means you can enjoy a tasty meal even on busy days. Second, the combination of flavors—zesty dill pickles and rich ranch dressing—makes every bite satisfying. Additionally, the crispy tortilla adds a delightful crunch that elevates the whole dish. If you’re looking for a simple yet flavorful wrap, this is the one for you!
How to make Dill Pickle Ranch Smash Chicken Wraps with Crispy Tortilla Crunch
Ingredients:
- 2 large tortillas
- 1 large chicken breast, thinly sliced
- 2 tbsp dill pickle juice
- 2 tbsp ranch dressing
- 1/4 cup shredded lettuce
- 1/4 cup diced pickles
- 1 tbsp olive oil
- Salt and pepper
Directions:
- Heat olive oil in a skillet over medium heat. Add thinly sliced chicken breast, seasoning with salt and pepper. Cook until golden brown and cooked through.
- In a bowl, mix together dill pickle juice and ranch dressing.
- Once chicken is done, remove from heat and let cool slightly.
- Lay out the tortillas and evenly distribute the shredded lettuce, diced pickles, and cooked chicken.
- Drizzle the dill pickle ranch mixture over the filling, then wrap the tortillas tightly around the filling.
- Optional: For a crispy finish, place the wraps in the skillet for a minute on each side until golden and crispy.
- Serve warm.
How to serve Dill Pickle Ranch Smash Chicken Wraps
You can serve these wraps warm right after making them. They are perfect on their own, but you can also add some extra sides like potato chips, a fresh salad, or even a side of extra ranch dressing for dipping. These wraps are great for lunch, a picnic, or a cozy dinner.
How to store Dill Pickle Ranch Smash Chicken Wraps
If you have leftovers, you can store the wraps in an airtight container in the fridge for up to 2 days. To reheat, place them in a skillet over medium heat until warmed through. This keeps the tortilla crispy while ensuring the filling is heated.
Tips to make Dill Pickle Ranch Smash Chicken Wraps
- Use a meat thermometer to ensure the chicken is cooked through; it should reach an internal temperature of 165°F (75°C).
- Feel free to adjust the amount of dill pickle juice and ranch dressing based on your taste preference.
- For added flavor, consider adding sliced avocado or tomatoes to the filling.
Variation
You can easily customize this recipe by using different proteins such as turkey or shredded beef instead of chicken. You can also switch up the veggies; add bell peppers or corn for extra crunch.
FAQs
Can I use pre-cooked chicken?
Yes, pre-cooked chicken is a great time-saver! Just warm it up in the skillet with the olive oil before adding it to your wrap.
Can I make these wraps ahead of time?
You can prepare the filling ahead of time and store it in the fridge. However, it’s best to assemble the wraps right before serving to keep the tortillas crisp.
What can I serve with these wraps?
These wraps pair well with a side of chips, a simple garden salad, or some fresh fruit. You can also serve them with extra ranch or a dipping sauce of your choice.
Dill Pickle Ranch Smash Chicken Wraps
Ingredients
Method
- Heat olive oil in a skillet over medium heat.
- Add thinly sliced chicken breast, seasoning with salt and pepper.
- Cook until golden brown and cooked through.
- In a bowl, mix together dill pickle juice and ranch dressing.
- Once chicken is done, remove from heat and let cool slightly.
- Lay out the tortillas and evenly distribute the shredded lettuce, diced pickles, and cooked chicken.
- Drizzle the dill pickle ranch mixture over the filling, then wrap the tortillas tightly around the filling.
- Optional: For a crispy finish, place the wraps in the skillet for a minute on each side until golden and crispy.