
why make this recipe
Making a DIY Butterfly Crystal Suncatcher is a fun way to decorate your home while adding a touch of nature. These colorful suncatchers can brighten up any room, especially when the sunlight shines through them. They also make great gifts for friends and family. Plus, creating your own suncatcher lets you express your creativity.
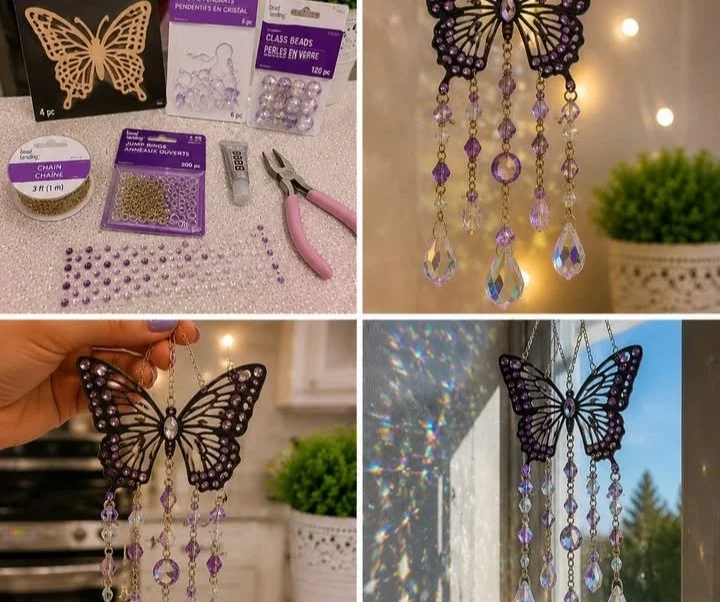
how to make DIY Butterfly Crystal Suncatcher
Ingredients :
- Clear plastic or glass cut into butterfly shapes
- Transparent acrylic paint or food coloring
- String or fishing line
- Scissors
- Clear glue
- Optional: beads or other embellishments
Directions :
- Start by cutting the clear plastic or glass into butterfly shapes. You can draw a butterfly outline on paper and use it as a template.
- Mix your transparent acrylic paint or food coloring with a little water if needed.
- Carefully paint the butterfly shapes. You can use different colors for each butterfly.
- If you want, sprinkle some beads or other embellishments on the wet paint.
- Allow the butterflies to dry completely. This usually takes a few hours.
- Once dry, use clear glue to attach a string or fishing line to the top of each butterfly.
- Hang your suncatcher in a window where it can catch the sunlight.
how to serve DIY Butterfly Crystal Suncatcher
You can display your Butterfly Crystal Suncatchers in any sunny window. They look beautiful during the day when light shines through them, creating a lovely rainbow effect on the walls and floors.
how to store DIY Butterfly Crystal Suncatcher
To keep your suncatchers safe, store them in a cool, dry place when not in use. You can wrap them in soft cloth or bubble wrap to prevent scratches or breaks.
tips to make DIY Butterfly Crystal Suncatcher
- Use vibrant colors to make your suncatchers stand out.
- Experiment with different shapes and sizes of butterflies.
- Consider adding glitter for an extra sparkle effect.
- Ensure your glue is fully dry before hanging to avoid any mishaps.
variation
You can create different designs by using other animals or shapes, such as stars or flowers. Changing the color palette or adding multiple layers can also give unique looks to your suncatchers.
FAQs
1. Can I use paper instead of plastic or glass for the suncatcher?
Yes, you can use sturdy paper, but it might not hold up as well when exposed to sunlight and moisture.
2. How long will the suncatcher last?
If made with care and stored properly, your suncatcher can last for several months or even years.
3. Can I use regular paint instead of acrylic?
Regular paint may not work well since it can flake off when dry. Acrylic paint is best for this project.
4. Is this project suitable for children?
Yes, this project is great for kids with adult supervision, especially during the cutting and painting steps.
5. How can I clean my suncatcher?
To clean it, simply use a soft, damp cloth to wipe off any dust or dirt gently. Avoid harsh chemicals that may damage the paint.
DIY Butterfly Crystal Suncatcher
Ingredients
Method
- Start by cutting the clear plastic or glass into butterfly shapes using scissors.
- You can draw a butterfly outline on paper and use it as a template.
- Mix your transparent acrylic paint or food coloring with a little water if needed.
- Carefully paint the butterfly shapes with different colors.
- If desired, sprinkle some beads or other embellishments on the wet paint.
- Allow the butterflies to dry completely, which usually takes a few hours.
- Once dry, use clear glue to attach a string or fishing line to the top of each butterfly.
- Hang your suncatcher in a window where it can catch the sunlight.