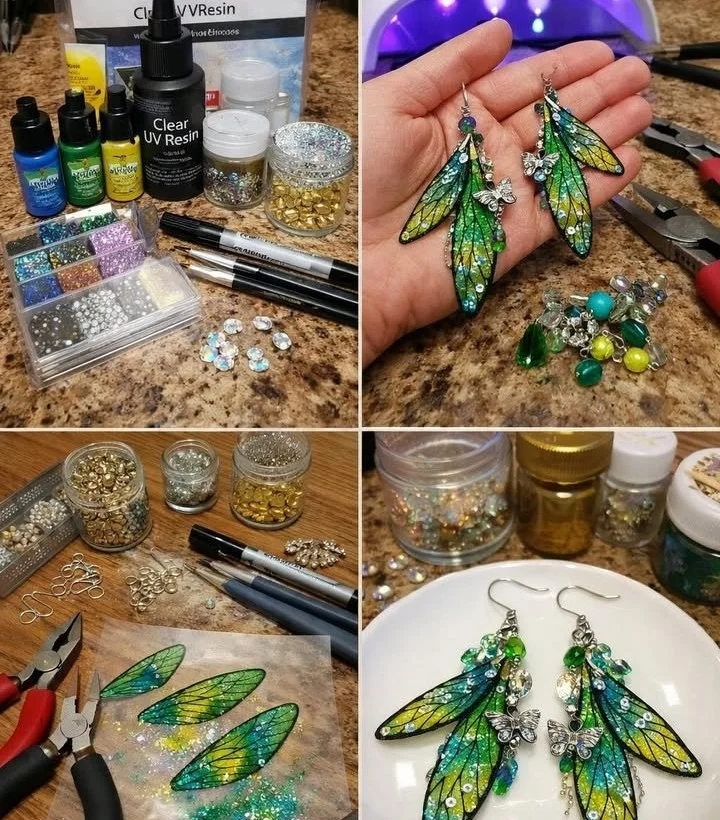
Go Back
DIY fairy wing butterfly earrings tutorial for a magical accessory

Fairy Wing Butterfly Earrings

Create beautiful and customizable fairy wing butterfly earrings that you can wear or gift. Perfect for adding a magical touch to any outfit!
Prep Time 1 hour
Total Time 2 hours
Servings: 1 pair
Course: Craft, DIY

Ingredients
  

Earring Materials
  • 1 sheet Transparent plastic sheet or clear UV resin This forms the base for your earrings.
  • various ounces Alcohol ink or transparent paint (green, blue, yellow) Use to color the wings.
  • 1 tablespoon Fine glitter To add shimmer to your wings.
  • 1 each Thin black paint pen or marker For drawing the veins of the wings.
  • 2 each Earring hooks To attach your earrings.
  • 4 each Jump rings To connect parts of the earrings.
  • 2 each Head pins For attaching beads.
  • 1 each Jewelry wire For constructing the earring loops.
  • 2 each Crystal beads For added decoration.
  • 2 each Small butterfly charms For decoration.
  • optional Seed beads Optional for extra embellishment.
  • optional Gold foil, rhinestones, iridescent powder, metallic paint Optional materials for creative options.

Method
 

Creating the Wings
  1. Draw long fairy-wing shapes onto the transparent plastic or resin and cut out matching wings.
  2. Blend transparent inks for color and add fine glitter to the wings.
  3. Use the paint pen to draw veins on the wings.
  4. Seal the wings with UV resin or varnish for durability.
Assembling the Earrings
  1. Thread beads onto head pins and wrap wire loops, then attach to the wings.
  2. Create the earring top by attaching charms and additional beads.
  3. Connect the earrings to hooks and tighten securely.

Notes

Store your earrings in a cool, dry place in a jewelry box or soft cloth pouch. Avoid direct sunlight exposure to maintain color.