Ingredients
Method
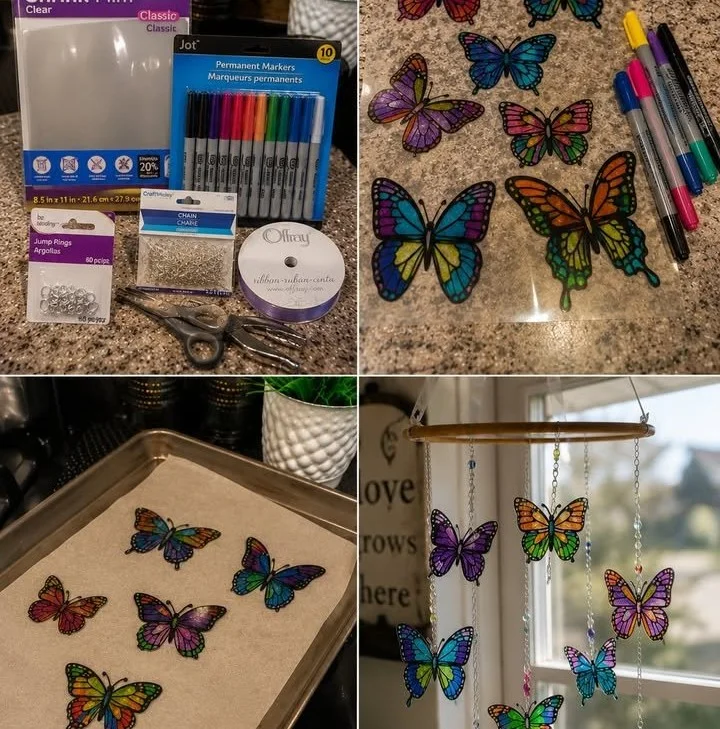
Creating the sun catchers
- Start by choosing a butterfly template or drawing your own butterfly shape on the transparent plastic sheet.
- Use colored markers or crayons to decorate the butterfly. Be as creative as you like with colors and patterns.
- Carefully cut out the butterfly shape with scissors.
- If you used contact paper, peel off one side to make it sticky. If using plastic sheets, you can use tape to secure the butterfly.
- Place another sheet of contact paper over the butterfly to seal in your design. Press it down firmly to avoid bubbles.
- Cut out the butterfly again, leaving a small edge around the design if desired.
- Use string or yarn to create a hanger and tape the top of the butterfly to the string.
- Find a sunny window and hang your beautiful butterfly sun catcher.
Notes
Store your butterfly sun catchers in a flat container or between sheets of paper when not in use. Keep them in a cool, dry place away from direct sunlight to maintain their colors. Use bright colors to make your butterflies pop and experiment with designs using glitter or stickers.