
Introduction
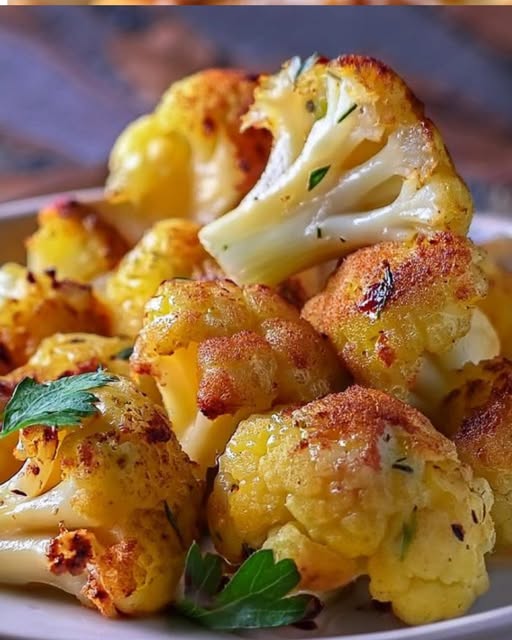
Looking for a creative and delicious way to enjoy vegetables? This Cheesy Garlic Parmesan Cauliflower dish is the answer! Combining the nutty flavor of roasted cauliflower with a rich, cheesy blend of Parmesan and mozzarella, this recipe is a perfect side dish for any meal. Garlic and Italian seasoning bring a delightful aroma and flavor, making it a hit with kids and adults alike.
Not only is it packed with flavor, but this dish is also simple to prepare, healthy, and versatile. Whether you’re hosting a dinner party or preparing a weeknight meal, this recipe will quickly become a favorite at your table.
Why You’ll Love This Recipe
- Healthy yet indulgent: Cauliflower is low-carb and full of nutrients, while the cheese adds a touch of decadence.
- Quick and easy: With minimal prep and just 30 minutes in the oven, it’s ideal for busy days.
- Crowd-pleaser: The combination of cheese and garlic makes it irresistible to all ages.
Ingredients
For this delicious dish, you’ll need:
- 1 large head of cauliflower, cut into bite-sized florets
- 3 tbsp olive oil
- 4 cloves garlic, minced
- 1/2 cup grated Parmesan cheese
- 1 cup shredded mozzarella cheese
- 1 tsp dried Italian seasoning
- 1/2 tsp salt
- 1/4 tsp black pepper
- Fresh parsley, chopped (for garnish)
Instructions
Step 1: Preheat the Oven
Set your oven to 400°F (200°C) and line a baking sheet with parchment paper. This ensures even cooking and easy cleanup.
Step 2: Prepare the Cauliflower
- In a large mixing bowl, combine the cauliflower florets, olive oil, minced garlic, Italian seasoning, salt, and black pepper.
- Toss everything together until the cauliflower is evenly coated in the flavorful mixture.
Step 3: Roast the Cauliflower
- Spread the seasoned cauliflower onto the prepared baking sheet in a single layer.
- Roast for 20-25 minutes, stirring halfway through, until the cauliflower becomes tender and lightly browned.
Step 4: Add the Cheese
- Remove the baking sheet from the oven and evenly sprinkle the roasted cauliflower with grated Parmesan cheese, followed by shredded mozzarella cheese.
- Return the tray to the oven and bake for an additional 5-7 minutes, or until the cheese is melted, golden, and bubbly.
Step 5: Garnish and Serve
- Take the cheesy cauliflower out of the oven and sprinkle it with chopped fresh parsley for a pop of color and flavor.
- Serve warm as a delightful side dish that pairs well with chicken, steak, or pasta.
Tips for Perfect Cheesy Garlic Parmesan Cauliflower
- Cut florets evenly: This ensures that the cauliflower cooks evenly and browns perfectly.
- Don’t overcrowd the pan: Spread the florets in a single layer for optimal roasting. Overcrowding can cause steaming instead of browning.
- Customizable cheese options: Swap mozzarella for cheddar or provolone for a different flavor profile.
- Add a spicy kick: Sprinkle a pinch of red pepper flakes for some heat.
- Make it vegan: Use dairy-free cheese alternatives and replace Parmesan with nutritional yeast.
Why Cauliflower?
Cauliflower is a nutritional powerhouse, rich in vitamins C and K, as well as fiber and antioxidants. It’s a versatile vegetable that absorbs flavors beautifully and is perfect for low-carb or gluten-free diets.
Serving Suggestions
This cheesy cauliflower dish pairs wonderfully with:
- Grilled chicken or steak for a hearty dinner.
- A fresh green salad for a lighter meal.
- As part of a vegetarian spread alongside roasted potatoes and steamed vegetables.
Conclusion
Whether you’re a cauliflower enthusiast or looking to introduce more vegetables into your meals, this Cheesy Garlic Parmesan Cauliflower recipe is sure to impress. Its irresistible combination of cheesy goodness and roasted garlic makes it a star side dish that’s both easy to prepare and bursting with flavor.
Give this recipe a try tonight and watch as it becomes a staple in your household!
What’s your favorite way to enjoy cauliflower? Let us know in the comments! 😊